

How can we help you?
Since Polylang 3.8 and Polylang Pro 3.8, the Language Switcher block is included in Polylang (previously exclusive to Polylang Pro). The 3.9 version introduces new customization options for the Language Switcher.
The purpose of the language switcher is to create links to the translations of your current page. By default, if the current page is untranslated, the language switcher links to the front page in the corresponding language.
Note: To avoid 404 errors, the language switcher does not display a language on the front end if there is no published content (post or page) in that language. If there is no content in any language, then the language switcher does not appear at all.
1. Add a language switcher
Polylang
Polylang Pro
Polylang Business Pack
1.1 Add a language switcher in a classic menu
For classic (non-block) themes, you can include the Polylang language switcher in your navigation menu.
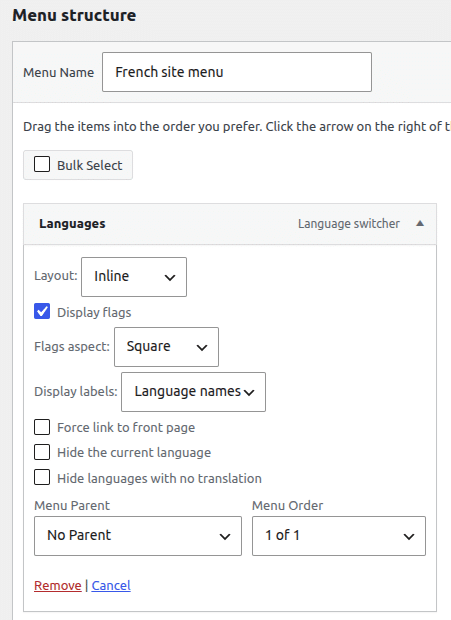
Go to Appearance > Menus, select your menu, and add the Language Switcher item.
If you don’t see the language switcher metabox, check that it is not disabled in the screen options (horizontal tab which can be unfolded as shown by buSince Polylang 3.9 and Polylang Pro 3.9, the Language Switcher has been enhanced with new customization options. The Language Switcher block, which was previously available only in Polylang Pro, is now included in Polylang as well.llet 3 in the “Menu” documentation).
Note: If you are using a block theme with Site Editor, the Appearance > Menus screen is no longer available. In this case, you can add the language switcher directly in the Navigation block. Refer to the Language switcher in the navigation block section for more details.
Refer to the “2. Configure the Language Switcher” section for details about each Language Switcher option.
1.2 Add a language switcher as a Block in the Widgets block editor
Polylang
Polylang Pro
Polylang Business Pack
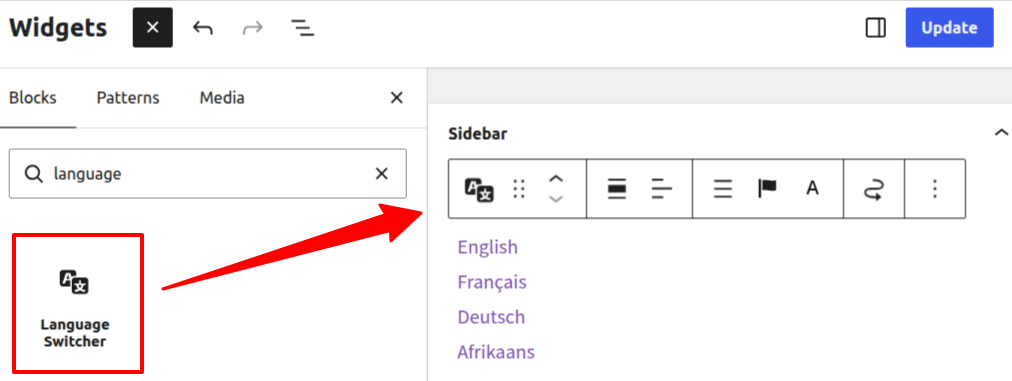
You can add a Language Switcher block in the widgets block editor available in Appearance > Widgets.
To add it, go to Appearance > Widgets, select the widget area where you want to display the language switcher, and click the + button to open the block inserter. Search for “Language Switcher”, then add the block to your widget area.
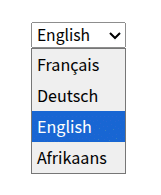
Among the available Layout options, you can display the Language Switcher as a Select.
If you choose this option for the widget, it is not possible to display flags due to HTML limitations. It is, however, possible to work around this limitation with JavaScript (not provided by Polylang). There is no such limitation when using this option in a menu.
It will look like this:
For the other options, refer to the “2. Configure the Language Switcher” section for details about each Language Switcher option
1.3 Language switcher as a block in the Block Editor
Polylang
Polylang Pro
Polylang Business Pack
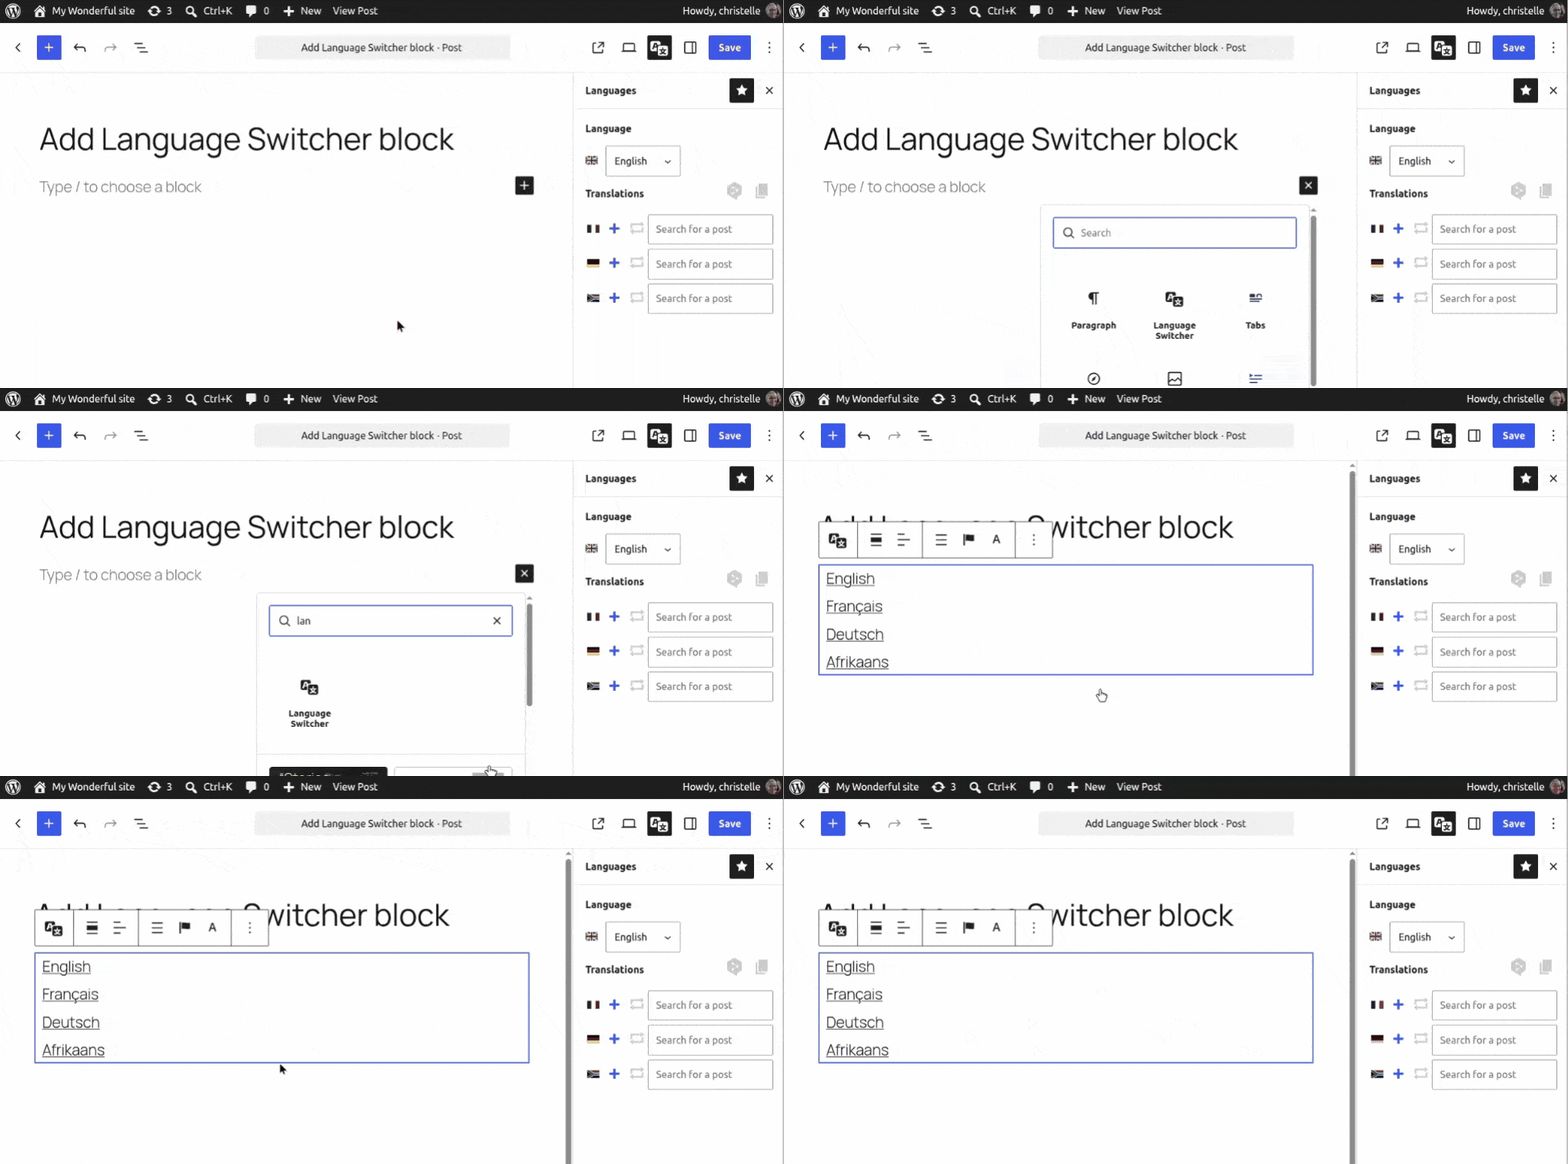
The Language Switcher is available as a block in the WordPress Block Editor. To add it, simply click the “+” button to add a block and search for the language switcher. Typing the first few letters should suffice to bring it up.
Refer to the “2. Configure the Language Switcher” section for details about each Language Switcher option.
1.4 Language switcher in the navigation block
Polylang
Polylang Pro
Polylang Business Pack
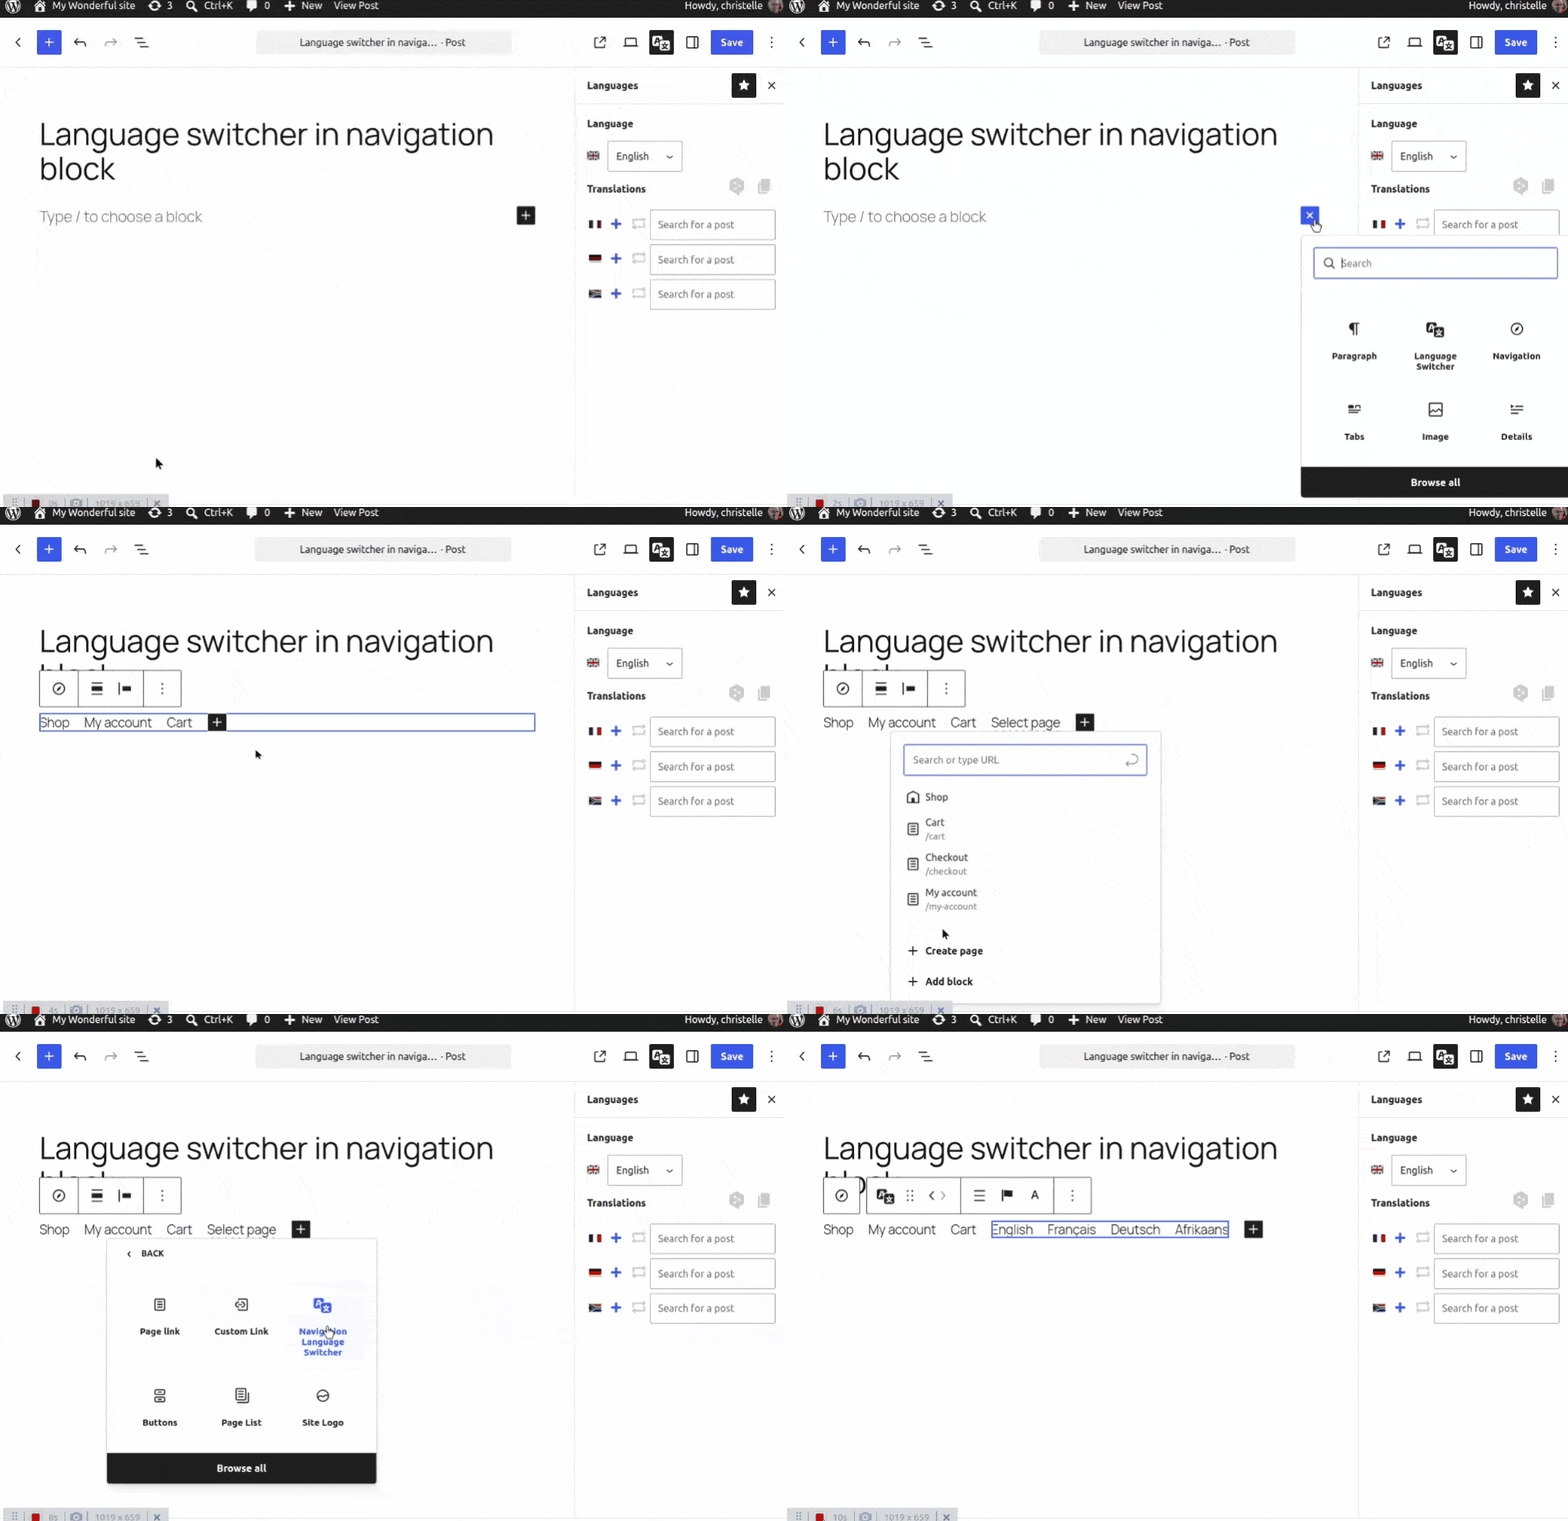
The Language Switcher can also be added as a block in the Navigation block.
Add a Navigation block. In this example, a menu containing some pages is already available. Then click “Add block” and select the Language Switcher.
Refer to the “2. Configure the Language Switcher” section for details about each Language Switcher option.
1.5 Language switcher in the Site Editor navigation
Polylang Pro
Polylang Business Pack
For block themes using the Site Editor, the navigation menu is managed through the Navigation section of the Site Editor (Appearance > Editor).
To create a multilingual navigation and add a language switcher to it, refer to the “How to make the navigation multilingual with the Site Editor” documentation.
Note: When adding a language switcher inside a Navigation block, make sure to use the Navigation Language Switcher block. This block is specifically designed for navigation menus, while the Language Switcher block is intended for widgets and other block areas.
1.6 Add a language switcher anywhere
Polylang
Polylang Pro
Polylang Business Pack
You can include a language switcher anywhere in your site by using the PHP template tag pll_the_languages().
2. Configure the Language Switcher
Polylang
Polylang Pro
Polylang Business Pack
This section applies to the Language Switcher block available in the Widgets editor, the Block Editor, and the Navigation block.
2.1 Display options
Once added, the Language Switcher block provides several display options in the quick toolbar. These options are also available in the block settings panel on the right:
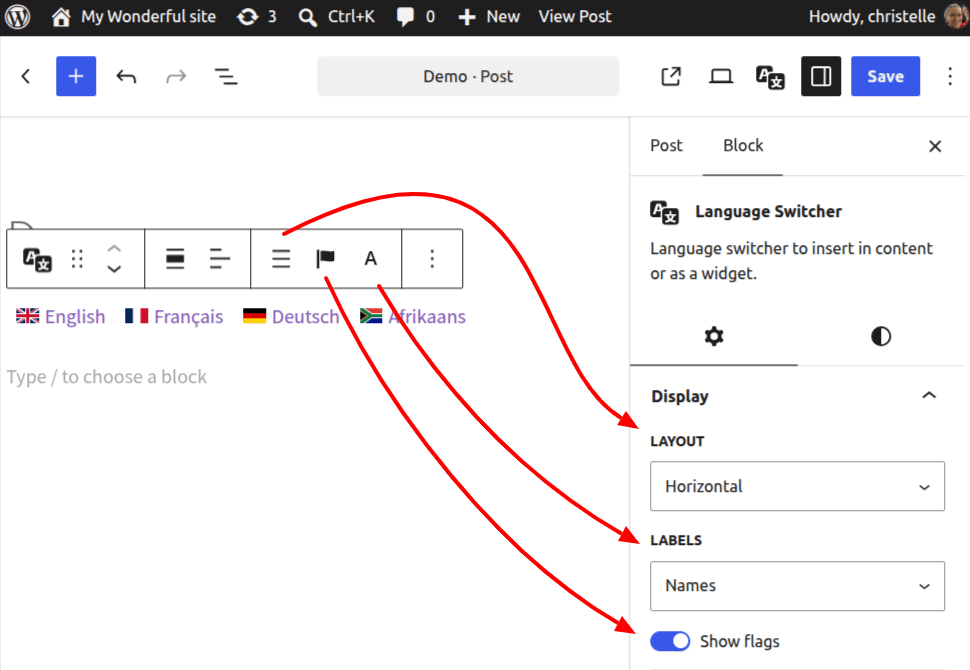
Layout: choose how the language switcher is displayed: Horizontal, Vertical, or Dropdown.
Display labels: choose what is displayed next to the flags:
- Language names (for example: English, Français)
- Language codes (for example: EN, FR)
- None (no labels displayed)
Show fags: enable or disable the display of language flags.
Flags settings
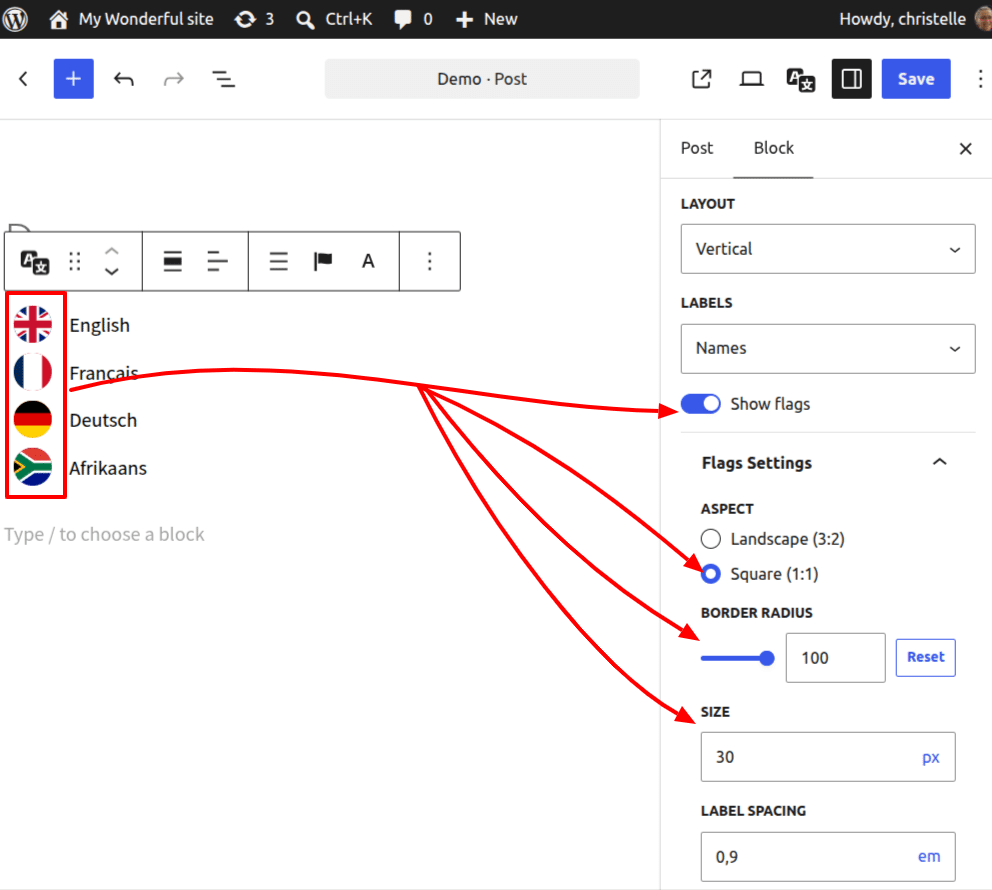
Use the Flags settings section to customize the appearance of the flags:
- Aspect: choose between Landscape (3:2) and Square (1:1).
- Border radius: adjust the roundness of the flag corners.
- Size: set the flag size and choose the unit (px, em, rem, vh, or vw).
- Label spacing: define the spacing between the flag and its label.
To display round flags, first select Square (1:1) in the Aspect setting, then set the Border radius to 100% as shown here:
2.2 Behavior
The Behavior section provides the following options:
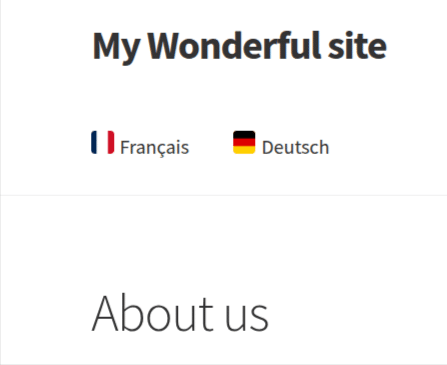
- Hide if no translation: hide languages that do not have a translation for the current content. If, for example, the current English post is not translated in French, the language switcher doesn’t display any link for French.
- Force home: you have the possibility to always link to the front page in the corresponding language even if the current page is translated.
- Hide current: choose this option to never display the current language. For example, if your home page is translated in three languages (English / German / French). When viewing the English home page the language switcher will only display German and French. You then click on French, the language switcher will display English and Italian as available languages to switch to.
3. Customizing flags
3.1 Use a flag from the predefined list
You can choose your language flag among all the flags when creating or editing a language. This flag is used on both frontend and admin sides.
3.2 Use a custom flag
It is possible to use your own images as flags. You have to use PNG or JPG files and name them with the WordPress locale. For example, en_GB.png. Then upload this file in the /wp-content/polylang/ directory (create the directory if it does not exist). Don’t use the /polylang/flags/ directory as your file would be removed when automatically updating the plugin.
Once the custom flag is uploaded, go in Languages > Settings > URL modifications module then click on save changes. Note that your custom flags are not used on admin side.
Developers can also access more options by using the filter pll_custom_flag
4. Order of languages
- You can choose the order of the languages in the language switcher when creating or editing a language.